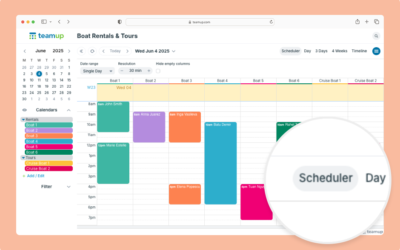
For a booking calendar, you might allow group members to self-book use of shared resources. You can set a booking calendar up so that users can request bookings, and then a staff member can review and approve the bookings. With this setup, there are two booking types on the calendar: tentative and confirmed. It’s helpful to have a visual distinction between these types of bookings. Here are three ways to set up your calendar so it’s easy to see different the booking status at a glance.
Show booking status with emojis
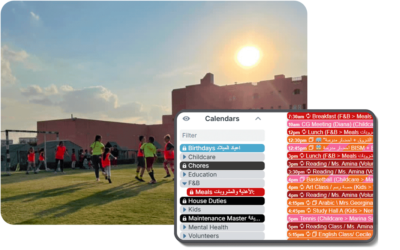
A custom choice field lets you set up predetermined options. For each option, you can assign an emoji and have it show in the event title. When someone makes a booking, they’ll choose from the preset options. The emoji provides an easy visual cue of the status.
- Create a custom choice field to indicate booking status.
- Add an option for each booking type (tentative, confirmed, etc.).
- Assign an emoji to each option.
- Set the emoji to show in the event title.
The resulting event blocks on the calendar will have the emoji in the event title, so it’s easy to scan a calendar view and identify which bookings are tentative and which are confirmed. You can make this field required to ensure that bookings cannot be added or modified unless the field is completed.
Show booking status with color blocks
You can use a custom choice field to color-code booking status with unicode color blocks. Copy and paste the needed color blocks into the name field for each option. Then set the name to show in the event title.
- Create a custom choice field to indicate booking status.
- Add an option for each booking type (tentative, confirmed, etc.).
- Paste unicode color blocks (copy from here) in each option name.
- Set the name to show in the event title.
The selected option from the custom field will show in the event title. The color blocks make it easy to quickly scan and see if a booking is tentative or confirmed, based on the color blocks showing in the event title. You can make this field required to ensure that bookings cannot be added or modified unless the field is completed.
Show booking status with striping
You can assign an event to multiple sub-calendars. When you do, the event will be striped with the assigned calendar colors. This is a great method to create a strong visual cue for the status of each booking. For example, all approved bookings can be assigned to a specific calendar along with the resource calendar, so they will have colorful striping.
- Along with the sub-calendars for bookable spaces or resources, create a sub-calendar for approved bookings.
- Make sure it is set to allow overlapping events.
- When a booking is confirmed, the schedule coordinator can assign it to the Approved Bookings sub-calendar along with the resource sub-calendar.
The colorful striping caused when a booking is assigned to multiple calendars makes it very obvious which bookings are confirmed.
What to consider
Which method will work best? It depends on how you want to handle calendar access and customized permissions for users. To use the custom fields method, you can give users the Modify my events permission for the bookable resource sub-calendars. If they add a booking to the calendar, they can update the status by changing the custom field. Use the Add only permission if you do not want users to change the status themselves. To use sub-calendars for color-coded striping, give users Modify my events or Add only permission for the bookable resource sub-calendars. They can have read-only access to the Approved Bookings sub-calendar, so they can see if their booking is approved but won’t be able to change approved bookings.The schedule coordinator would have Modify access to all sub-calendars so they can update the status as they review each requested booking.


