In some scenarios, teams or community members benefit from having a simple approval system in place, where users can submit requests, and a supervisor reviews and approves (or denies) them before anything is finalized. This is common for time-off requests, event submissions, situations where requests need to be reviewed before being confirmed. Without a clear process, these requests can quickly become scattered across emails or messages, making them harder to track, review, and manage efficiently.
The need: Teams need a simple way to handle requests that require review, without relying on scattered tools or multiple follow-ups.
The Teamup solution: You can turn your calendar into a lightweight approval system. Requests are submitted as events, reviewed by the people in charge, and only added to the main schedule once they’re approved. By structuring your calendar with the right sub-calendars and access permissions, you create a clear and visible process, without adding extra tools or complexity.
How the approval workflow works
In Teamup, each step happens directly in the calendar:
- Submit: Users add requests as events using add-only access
- Review: Requests appear in a dedicated “Pending” calendar
- Approve: A supervisor reviews and updates each request
- Publish: Approved events are added to the final schedule
Set up your approval system in Teamup
The idea is to separate incoming requests from approved events. You’ll use one sub-calendar to collect requests, give users permission to submit events, and then review and approve them before adding them to the final schedule.
⚙️ How to set it up:
- Create a “Pending Approval” sub-calendar for incoming requests.
- Give users add-only access to submit requests.
- Use event fields to collect key information.
- Review and edit requests as needed.
- Approve by moving events to the final calendar.
Submitting requests
Anyone who needs to submit a request can do so by adding an event to the “Pending Approval” sub-calendar.
Since events in Teamup can be assigned to more than one sub-calendar, requesters can also add the event to another relevant calendar at the same time. This helps keep requests visible in context while still going through the approval process.

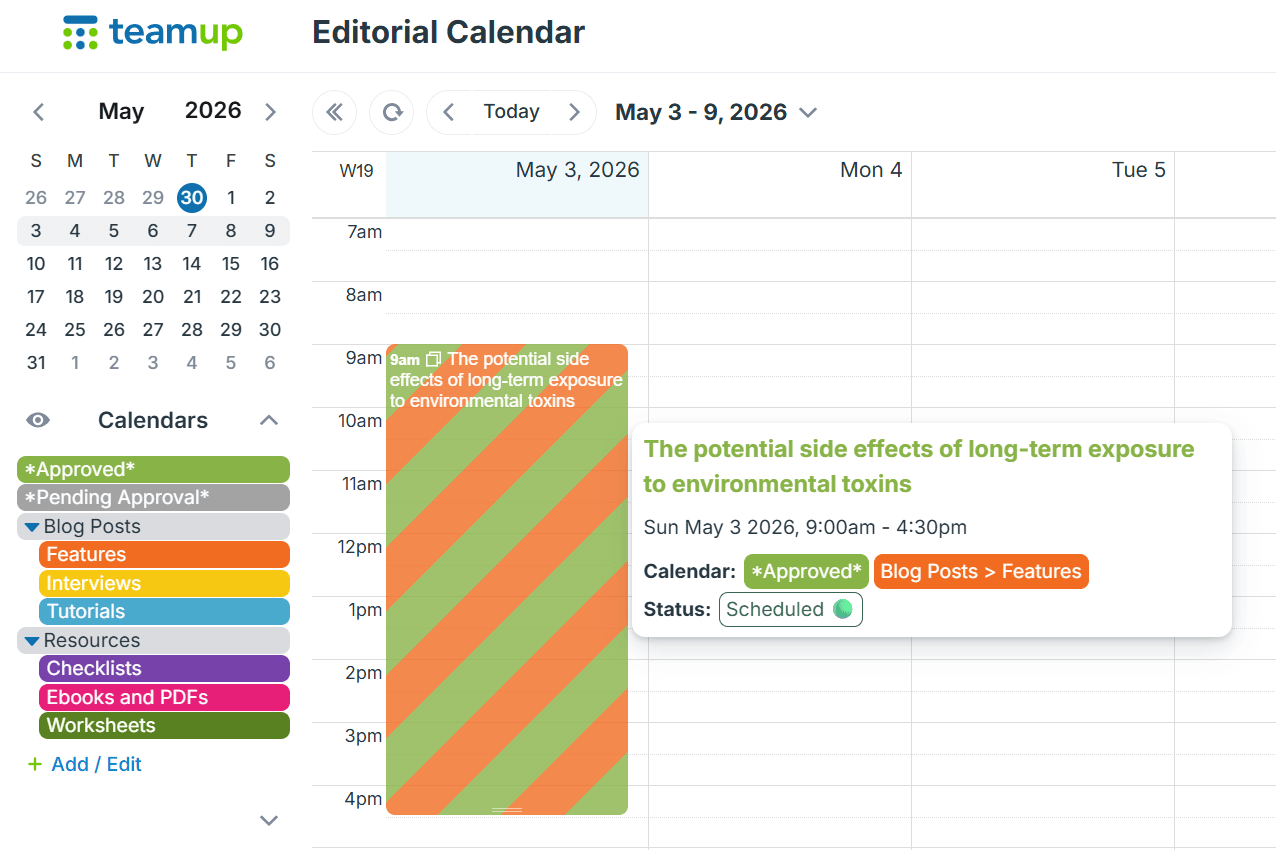
Click to enlarge: Set up sub-calendars to include Approved and Pending events.
For example:
- A time-off request can be added to both the Pending Approval sub-calendar and the employee’s own calendar.
- A content idea can be submitted to both Pending Approval and a related calendar (such as blog posts or video content).
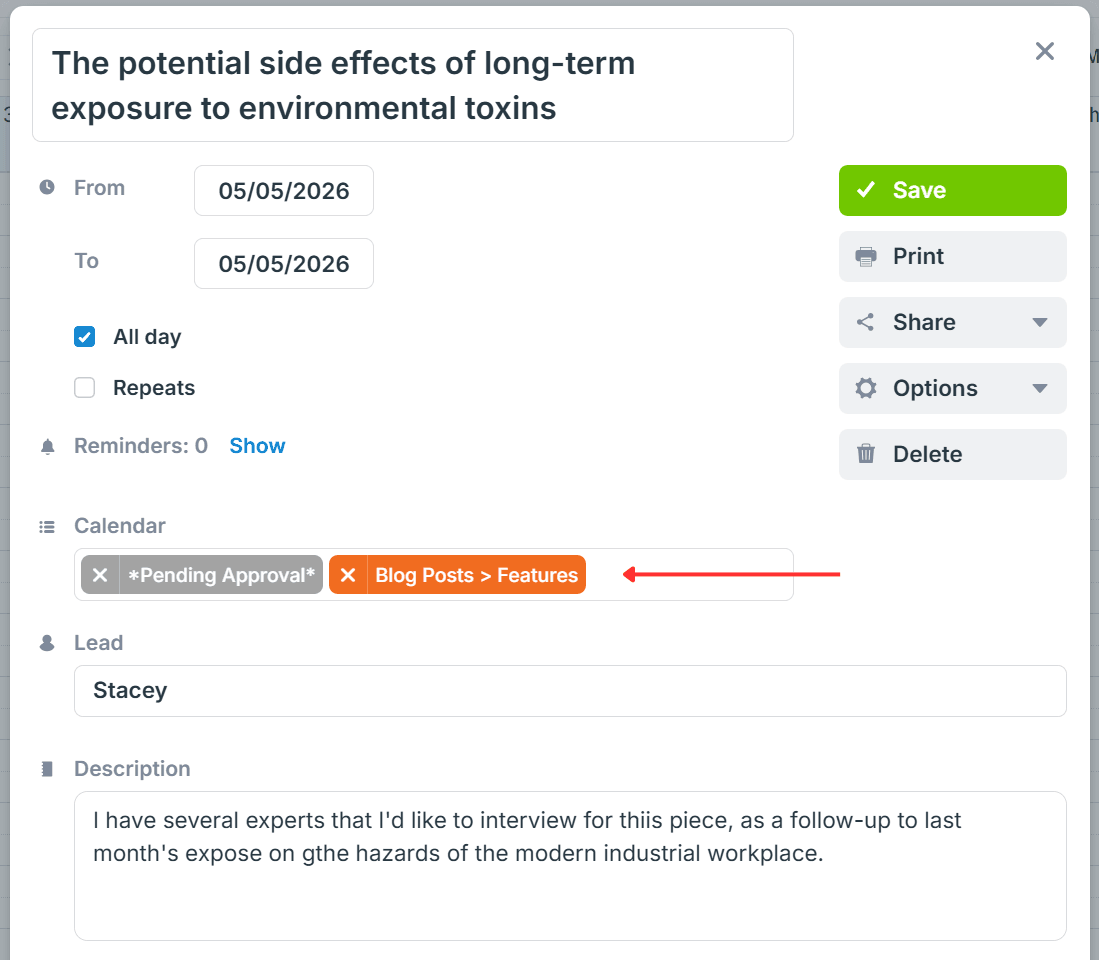
Click to enlarge: An event can be assigned to multiple sub-calendars.
Event fields can be used to capture the key details for each request, such as type, notes, or contact information.
Reviewing requests
Supervisors can receive email notifications whenever a new request is submitted or updated. If the volume of requests is high, notifications can be set to a Daily Summary instead of individual alerts.
If a request needs clarification or changes, event comments can be used to communicate directly on the event. This keeps all discussion in one place and makes it easier to track decisions.
You can enable comments by default and adjust visibility depending on your setup. If contributors have limited access (such as add-only), make sure comments are visible to all users so they can participate in the discussion.
Approving requests
To approve a request, the supervisor just updates the event to reflect its confirmed status. This can be done by moving the event from the Pending Approval sub-calendar to an Approved or Confirmed calendar.
Click to enlarge: Move an event to the “Approved” sub-calendar when appropriate. All the event details stay with the event.
If the event has been assigned to multiple sub-calendars (for example, an individual’s calendar or a staff vacation calendar), approval can be as simple as removing the “Pending Approval” sub-calendar. The event will then remain in the relevant calendar, indicating that it has been reviewed and approved.
You can also create a sub-calendar for denied requests, if needed. In many cases, this isn’t necessary. However, it can be useful if you need to track rejected requests or provide feedback, such as explaining why a request was denied or how it can be updated and resubmitted.
Want to try it out? Explore with a live demo to see how this setup could work for you.