Teamup calendar settings are the control center of the calendar, where the calendar administrator can create sub-calendars, manage users, and configure settings. Settings are accessible only in a browser (not in the Teamup app). Here’s how to access and use settings to configure Teamup for your needs.
Calendar settings are only available in a browser with administrator access.
- Open Teamup in a browser.
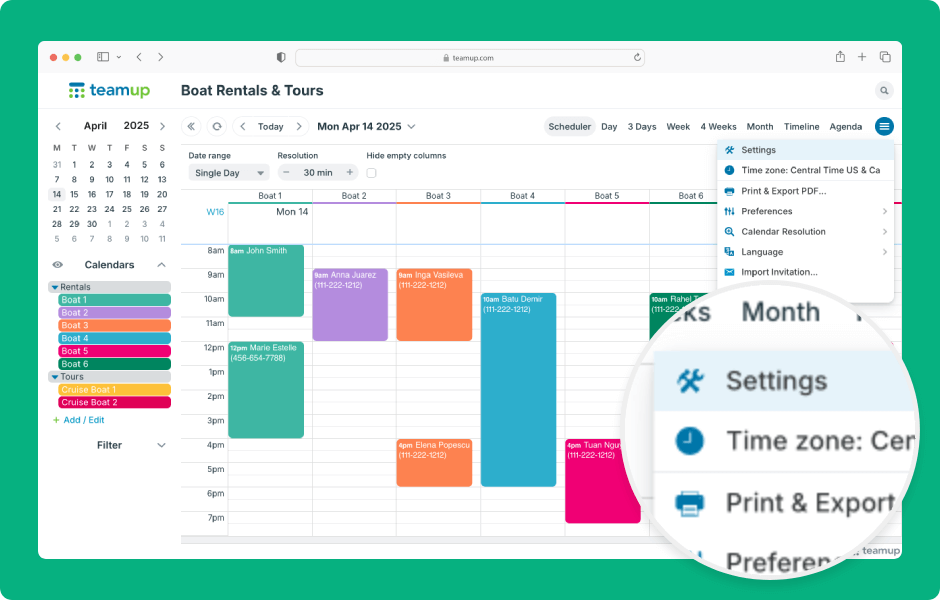
- Click the blue menu (top right).
- Select Settings from the menu.
- Click a section title (left sidebar) to navigate to that section of settings.
- Click the Back to calendar button (top left) to exit settings.
- Click the Add/Edit link under the Calendars list to go directly to the Calendars section of settings.
- On smaller screens, the settings display will be optimized for space.
- Click the green menu (top right) to navigate to different sections.
ℹ️ Learn more