Embedding Teamup is a great way to securely share events with a group or the public. Here’s how to create a secure read-only calendar link to use for embedding a Teamup calendar.
Access level required: Administrator
- Open Teamup in a browser. Click the blue menu (top right).
- Click Settings.
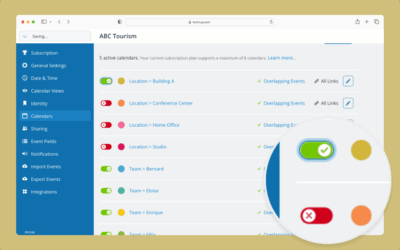
- Click Sharing.
- Click Create Link.
- Give the link a specific name, e.g. “Embedding Link”.
- Select All calendars to show all sub-calendars in the embedded calendar.
- Select Read-only as the permission.
- Or choose Selected calendars to show only some sub-calendars in the embedded calendar.
- Select Read-only for the sub-calendars you want to include.
- Select Not shared for the sub-calendars you do not want to include.
- Click Save.
- Go to the Integrations tab.
- Click Embed Wizard.
- Click the Calendar Link menu.
- Select the Embedding Link from the menu.
- Click Continue to open the Embed Wizard with that link pre-loaded.
You can then adjust the look and feel of your embedded Teamup calendar using the Embed Wizard’s options. When you’re ready, copy the customized iFrame code or URL to put in your website’s HTML editor.
ℹ️ Learn more