Since we’re connected globally, both personally and professionally, we need tools to manage scheduling across multiple time zones. To schedule and share events for people in different time zones, you need to know which time zone you’re viewing and be able to quickly change time zone. Here’s how to do that in several popular calendars.
View and change the time zone in Teamup
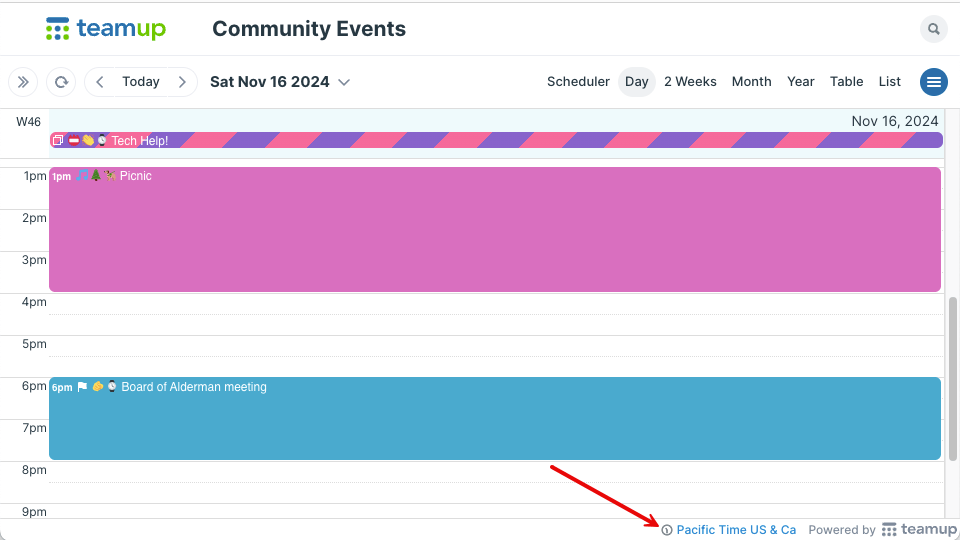
Always visible time zone
There’s a time zone indicator in the bottom right of your Teamup calendar. It’s visible in any calendar view:
Quick time zone change
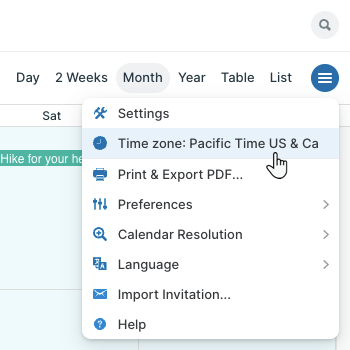
To change the time zone, click the time zone indicator and select from the pop-up menu, then click Ok. It’s that easy.
Alternately, click the blue options menu (top right). The current time zone is displayed in the menu. Click to open the pop-up and select a different time zone.
View and change the time zone in Outlook
There are different versions of Outlook. The desktop app (for both Windows and Mac) has both a classic and new version. Outlook on the web, or Outlook.com, is the browser-based version. See more about managing time zones in Outlook.
The current time zone is not displayed by default in Outlook, in any version. To make the time zone visible in the calendar, you need to set up additional time zones.
Outlook for Windows
View the time zone
Here’s how to set it up in the classic version of the Outlook desktop app:
- In Outlook, go to File > Options. Or right-click the calendar icon, then select Options.
- Scroll to the Time zones section to see the currently selected time zone.
- To set up an additional time zone, check the box for Show a second time zone, then select the one you want in the Time zone field.
Once you’ve set up more than one time zone, you can see them in the calendar view. Switch to the Week, Day, or Schedule view. A vertical time bar (left side) shows in the Week and Day views. Time zines are displayed horizontally (top) in the Schedule view.
The process is similar in the new version of Outlook’s desktop app:
- Click the gear icon (top right), then go to Settings > Calendar.
- In the View tab, scroll to the Time zones section.
- Check the Display my calendar in time zone field to see the currently selected time zone.
To make the time zone visible in your Outlook calendar view, click the Add time zone button and select the time zone from the menu. Be sure to check the Show in calendar box to include this time zone in your calendar display. Once you’ve added at least one more time zone, your Outlook calendar will display a time bar in the Day, Workweek, and Week views. Time zones are not shown in the Month view. Click the time bar, then select Time zones to show or hide the additional time zones.
Change the time zone
In the classic version of Outlook:
- In Outlook, go to File > Options. Or right-click the calendar icon, then select Options.
- Scroll to the Time zones section.
- Click into the Time zone field and select the time zone.
In the new version of Outlook:
- Click the gear icon (top right), then go to Settings > Calendar.
- In the View tab, scroll to the Time zones section.
- In the Display my calendar in time zone field, select the time zone you want.
Outlook on the web (Outlook.com)
Outlook on a browser has the same basic approach to time zone display as the Outlook desktop app; that is, the time zone is not displayed in the calendar unless you set up more than one time zone in the settings.
View the time zone
- Click the gear icon (top right), then go to Settings > Calendar.
- In the View tab, scroll to the Time zones section.
- Check the Display my calendar in time zone field to see the currently selected time zone.
To make the time zone visible in your Outlook calendar view, click the Add time zone button and select the time zone from the menu. Be sure to check the Show in calendar box to include this time zone in your calendar display. Outlook on the web will now show a time bar at the top (except in the Month view; time zones are not shown). Click the time bar, then select Time zones to show or hide the additional time zones.
Change the time zone
- Click the gear icon (top right) to open the settings menu.
- Go to Settings > Calendar.
- In the View tab, scroll to the Time zones section.
- In the Display my calendar in time zone field, select the time zone you want.
- To change other displayed time zones that you’ve added, click into the field for the respective time zone and select from the menu.
View and change the time zone in Google Calendar
View the time zone
To see your current time zone displayed in Google Calendar, you’ll need to set up a secondary time zone. You can do this in the calendar settings:
- In a browser, open Google Calendar.
- Click the gear icon at the top, then click Settings > Time Zone. The Primary time zone box displays your current time zone.
- To add another time zone, check the box beside Display secondary time zone, then select a time zone from the menu.
In views with a time grid, you’ll see both time zones displayed in a column on the left side of the calendar.
Change the time zone
You can change the primary or secondary time zone if needed; go to Settings > Time Zone and select the time zone you need from the menu.
You can also change the time zone for only one individual calendar. However, be aware that doing so will not automatically create events in that calendar’s selected time zone. Events will default to your primary time zone, even if they individual calendar has a different time zone setting. You can manually change the time zone when you create those events.
View and change the time zone in Apple Calendar
View the time zone
By default, Apple calendar is set to your computer’s current time zone (set in Date & Time settings) and is not displayed in the calendar. However, you can adjust the settings:
- Open the Calendar app on your Mac.
- Go to Calendar > Settings.
- Click Advanced, then check the box next to Turn on time zone support.
The calendar will now show a time zone menu next to the search field (top right). The menu will show the currently displayed time zone.
Change the time zone
To change the time zone, click into the time zone menu and click Other. In the pop-up dialog, choose the time zone you want to display, then click OK. Change back to your original time zone by clicking into the time zone menu and selecting it.
Easy time zone management with Teamup
Teamup makes time zone management easy. You can always see your current time zone at a glance, and change it quickly to view events in other time zones. Teamup handles time zone conversions automatically, and updates time zones as needed for daylight saving time changes. Check out current time in world cities or how to simplify scheduling across multiple time zones.