The 1-on-1
Appointment Maker
THE NEEDS
A trainer offers open hours for his clients to book appointments.
- The trainer needs to be able to easily update his available time or block dates of unavailability.
- A client can request an appointment right from the calendar.
- The trainer needs to confirm the appointment with the client.
- The appointment calendar needs to be embedded into a website or a Facebook.

The Solution
Make the availability visible. Make use of recurring events. Allow clients to book an appointment directly on the calendar. Use the Duplicate function to minimize typing. This solution addresses the scenario with pre-defined booking slots. It is possible to allow arbitrary appointments.
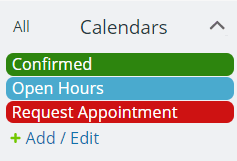
Color-coded Sub-calendars
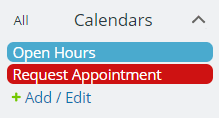
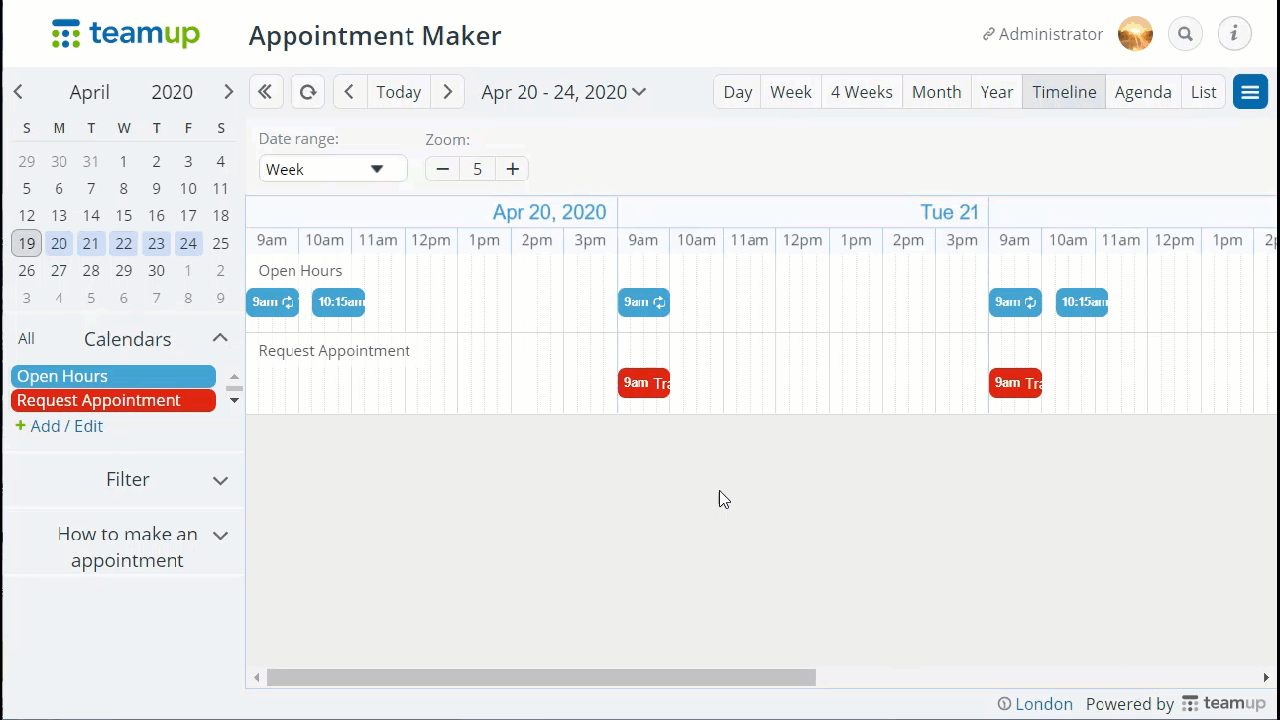
- Open hours calendar: For the trainer to publish open hours. Make use of recurring events to easily display and update open hours.
- Request Appointment calendar: For clients to request appointments. Set the calendars to disallow double booking since there is only one coach available in this case.
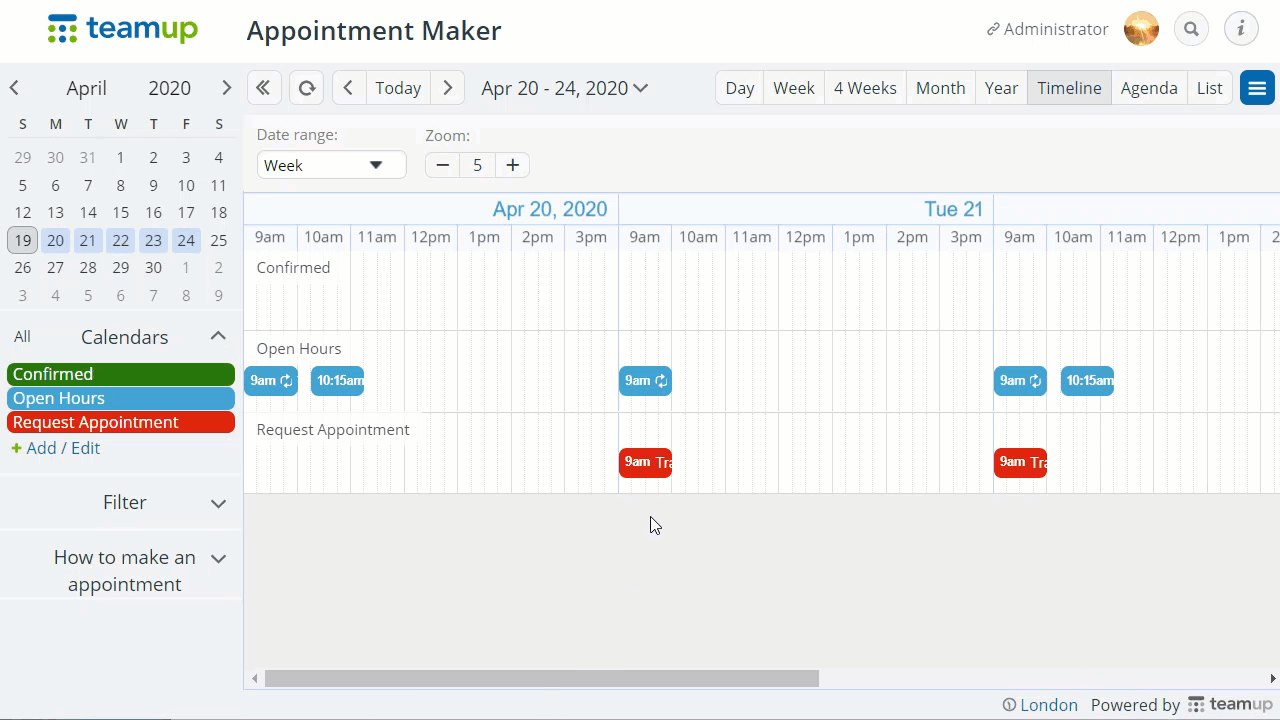
- Confirmed appointments:
- Option 1: Use a calendar named “Confirmed” and assign the requested appointment to it when the appointment is confirmed. Learn ore about assigning one event to multiple calendars.
- Option 2: Without the “Confirmed” calendar, instead, use a custom field for the status. When it is confirmed, have an emoji displayed in the event title.
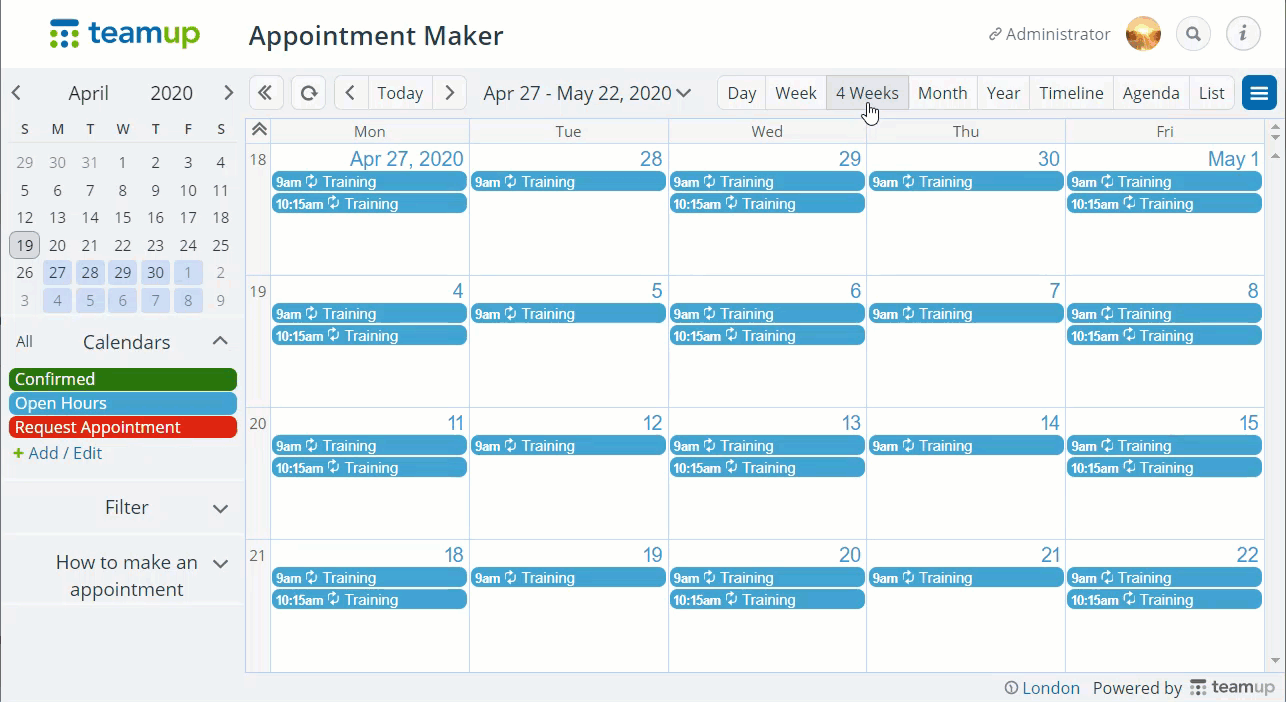
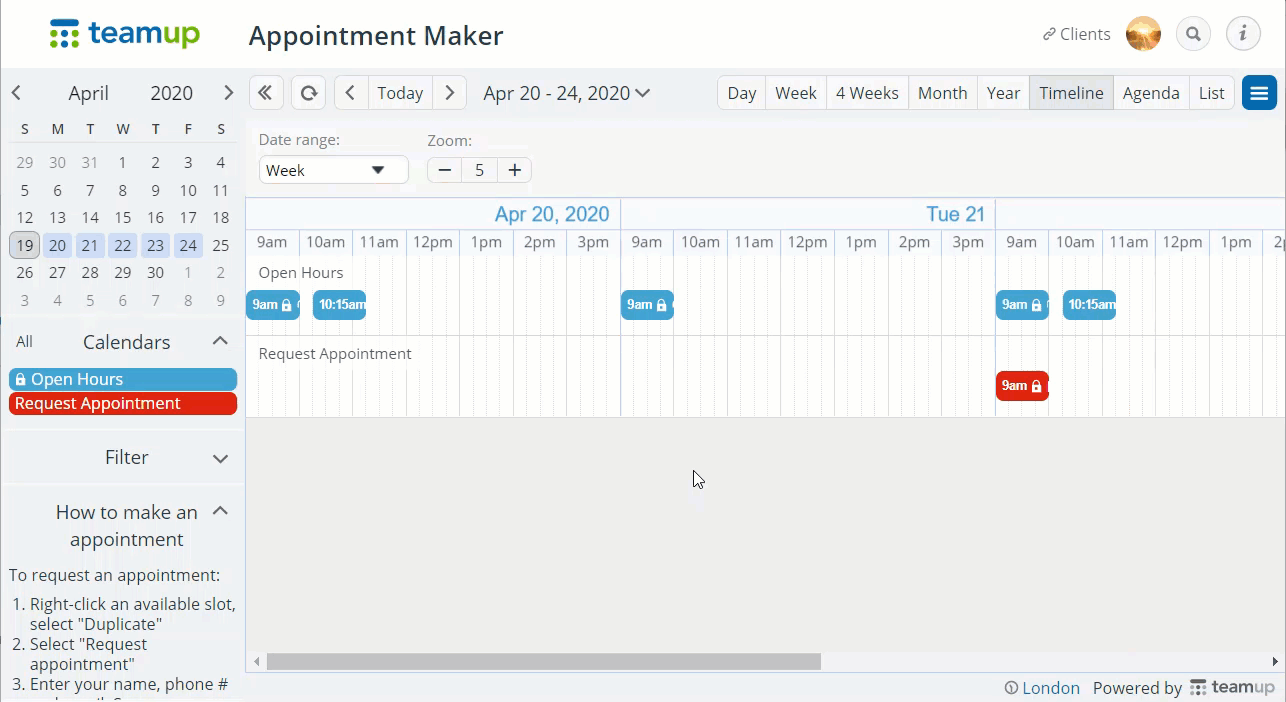
Open hours at a glance
- Teamup supports 10 calendar views, from one day at a time to a whole year at a glance. It’s easy to switch the views in the top right and see the availability in the time frame of interest.
- Choose an appropriate calendar view as the default, and configure the specifics in Settings > Calendar Views.
- Hide weekend if no business hours on weekends
- Create recurring events if applicable
- Allow variations, e.g. a slot is an hour shifted
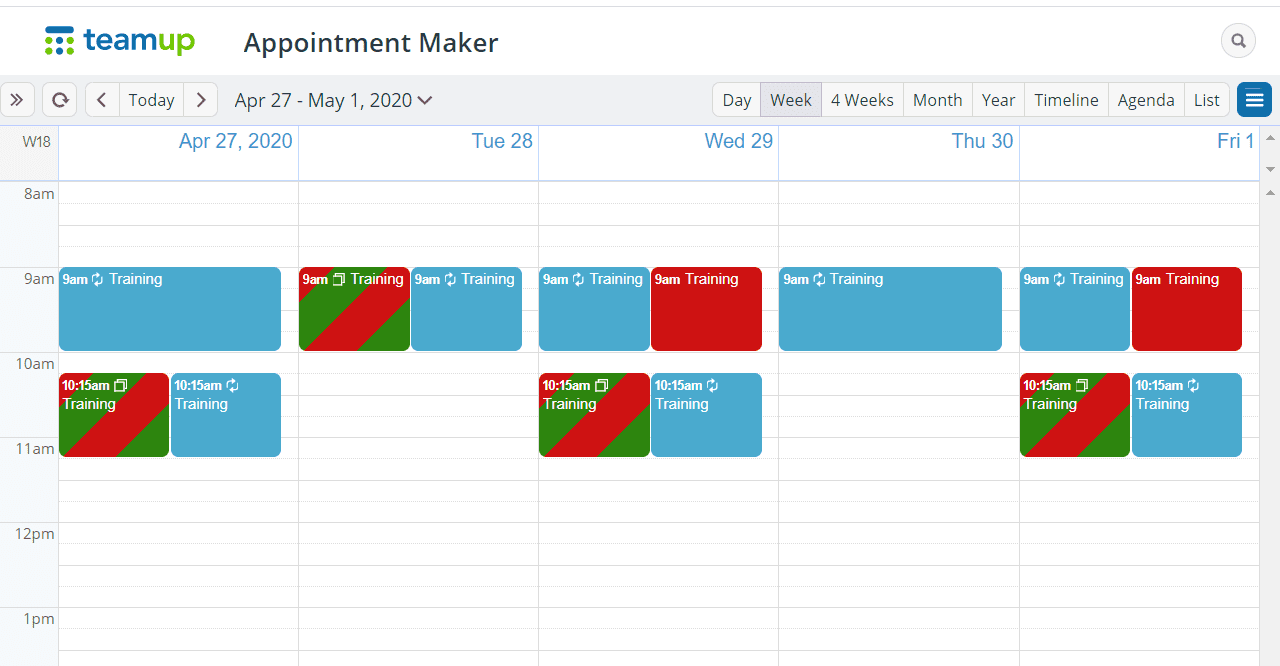
Overview with bookings visualized
- The red boxes show where appointments have been requested but yet to be confirmed.
- The boxes with the read and green stripes are appointments that have been confirmed.
Administrator: Setting up access for clients
The calendar administrator can set sharable calendar links or account users in Settings. Assign the client link the following permissions:
- Read-only access to the “Open hours” calendar.
- Add-only-no-details access to the “Request appointments” calendar.
If it is necessary to create a unique link for a specific client, simply create another link with the these permissions.
Since this scenario is only about a trainer and his clients, the trainer can be the calendar administrator who also uses the administrator link to manages the appointments. If there is an assistant who manages the appointments but does not need access to the calendar Settings, create another link with the Modify permission for that person.
Learn about how to share only selected sub-calendars →
Client: Book an appointment
To request an appointment from the client calendar, the client needs to:
- right-click an available slot, select “Duplicate”
- select “Request appointment”
- enter his or her name, phone # and email. Save.
If the request is accepted, the client will receive a text or email confirmation.
Trainer or administrator:
Confirm appointments (option 1)
- subscribe to be notified when a client requests an appointment;
- go to the calendar, open the request submitted, and assign it also to the “Confirmed” calendar, save;
- use the Share menu to let the client know the appointment is confirmed.
Trainer or administrator:
Confirm appointments (option 2)
The trainer or administrator would keep his availability up-to-date directly on the calendar and have the slots ready for clients:
- subscribe to be notified when a client requests an appointment.
- go to the calendar, open the submitted request, and check the status “Booked”, optionally change the status of the original open hour also to “Booked”. Save.
- use the Share menu to let the client know the appointment is confirmed.

Trainer or administrator:
Share confirmation with clients
- To send the client a confirmation email or text, use the event sharing function on our mobile apps, or repeat later as a proactive reminder.
- When the client opens the event page URL, he or she will be able to save the appointment directly to their personal calendar.
Getting Started
Video Tutorials
Feature Tips
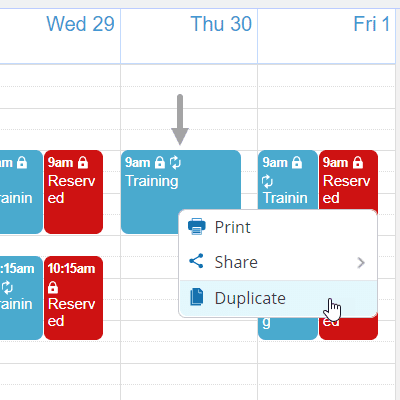
Right click to duplicate event
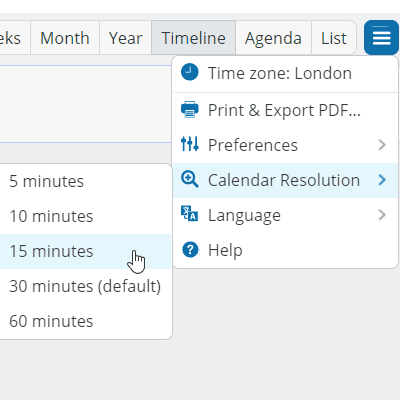
Change calendar resolution
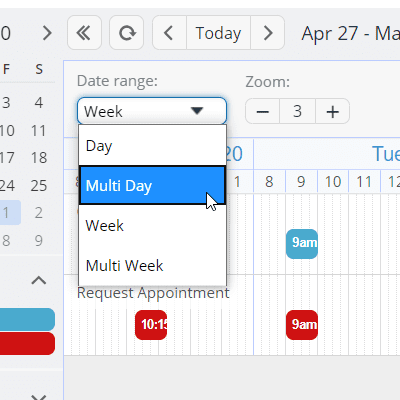
Adjust date range in timeline
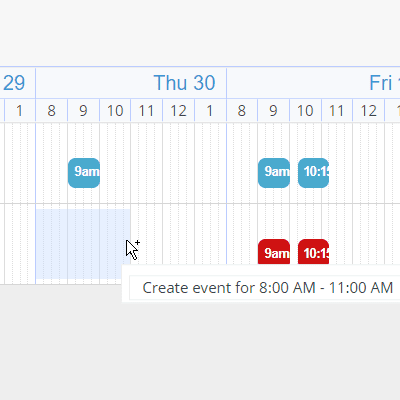
Drag over a slot to select time
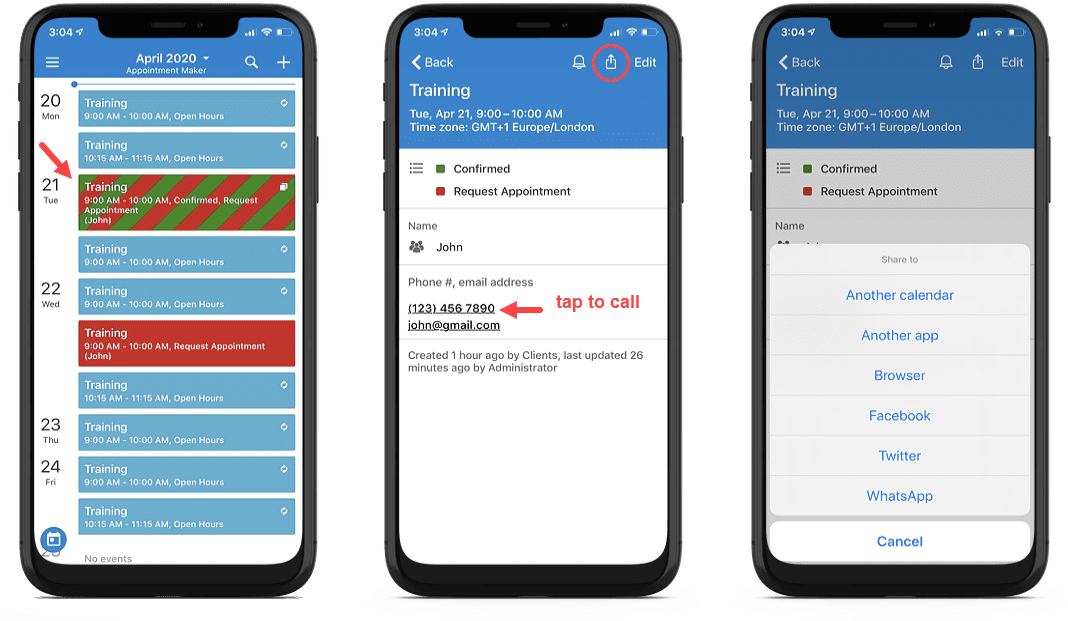
Trainer: Email or text the appointment as a confirmation to the client
On the app: Tap the phone number to initiate a call directly.
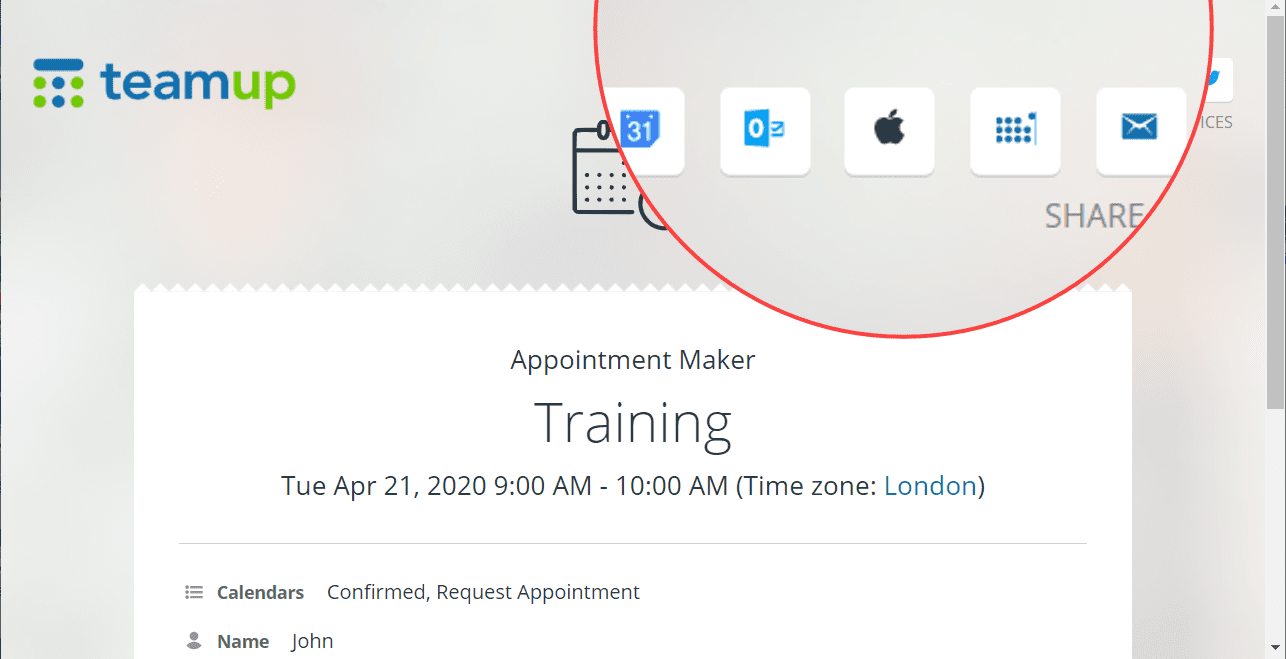
Client: Add the appointment directly to their personal calendar
Integration
Embed Calendar into Websites
Embed your appointment calendar into a website or your Facebook page for clients to signup.
Live embedded appointment calendar
Good to Know
🎉 What you get for free
By far, most Teamup users are on our free plan: no cost for a flexible, powerful calendar service. We’re happy to provide a free service that helps people to work efficiently and do more of what they love.
🏆 Subscription plans
If you need more advanced features such as uploading files or additional custom fields, or prefer extra access control to better protect your calendar data, then simply upgrade to a subscription plan.
Ready to get started?
It’s free, simple and easy. Getting started requires no user account nor credit card.
You can also start with a free trial of paid plans with more features, or
get inspired by browsing what others say and our million thanks.
TABLE OF CONTENTS